
Installing Library package in Raspberry Pi-Chapter 2
Normally in every platform like windows, IOS or Linux based systems, we used to install applications or libraries based on our requirement. Since Raspberry Pi is a Linux based system, we need some application for example: Python for programming and libraries for example: urllib for the URL based programming functions.
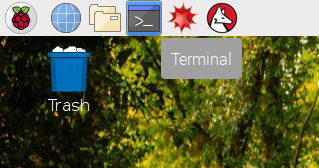
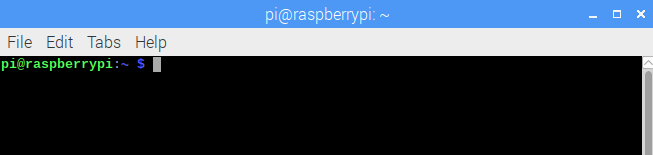
To install such type of applications or Library packages, Click Terminal icon in the top of the Raspberry Pi window, the icon looks like below
For installing Package, the APT command can be used, the apt-get command is available in every Linux based OS. If some package is not available in APT command, those Packages and libraries can be installed using PIP command (Python Package Index)
Now let’s see, how to give commands to install Application and libraries.
Every command should be typed in the Terminal, In every below command sudo resembles that “super user do”. If command is given by without “sudo” it shows “Permission denied” error
Normally pip is available in Raspbian, if there is no PIP in any other O version, open the terminal and type the following command in Terminal to install pip.
List of Libraries availabe below
- OpenCV for python 2 and 3
- Fswebcam
- MQTT
- DHT11 Sensor
- PyautoGUI
- Tkinter
- Xlib
- espeak
- Festival
- PyQt4
- Xrdp
- midori
- Apache web server
- Matplotlib
- Gspread
To install PIP:
PIP for python2 - sudo apt-get install python-pip
PIP for python3 - sudo apt-get install python3-pip
To Update packages:
The below commands are for updating every applications or package which already installed.
sudo apt-get update
sudo apt-get upgrade
To install python3:
Python2 is available with Raspbian OS.
To install python3 in Raspberry Pi
sudo apt-get install python3To install OpenCV in Raspberry Pi for python2 in single command:
sudo apt-get install libopencv-dev python-opencvTo install OpenCV in Raspberry Pi for python3 in single command:
sudo apt install libqtgui4sudo apt install libqt4-testsudo pip3 install opencv-pythonTo use Camera in Raspberry Pi:
fswebcam is needed to handle camera related applications
sudo apt-get install fswebcamTo use MQTT Protocol in Raspberry Pi:
Message Queuing telemetry Transport library to use mqtt protocol based applications
sudo pip install paho-mqttTo interface DHT11 Sensor with Raspberry Pi
sudo apt-get install git-core

git clone https://github.com/adafruit/Adafruit_Python_DHT.git

cd Adafruit_Python_DHT

sudo apt-get install build-essential python-dev

sudo python setup.py install
Pyautogui:
Pyautogui Library is for mouse and keyboard related function without accessing physically, we can able to access through python code using pyautogui library. Visit pyautogui cheat sheet for more mouse and keyboard related functions.
Pyautogui for python 2 - sudo pip2 install pyautogui
Pyautogui for python 3 - sudo pip3 install pyautogui
Tkinter:
For GUI based application, ex: creating a graphical view like virtual keyboard using push-buttons, text box etc.
sudo apt-get install python3-tkif it ask for Xlib library enter the below command
Xlib:
sudo pip3 install XlibVoice output in Raspberry Pi:
There are two voice output that we can use in Raspberry Pi
espeak voice output:
sudo apt-get install espeakFestival voice output:
sudo apt-get install festivalPython code to use espeak and festival
import espeak
import festival
import subprocess
data="Hai Pantech"
subprocess.call(["espeak",data]) #for espeak
subprocess.call('echo '+data+'|festival --tts', shell=True)
pyQT4:
It is also GUI based designing for Raspberry Pi
pyQt4 for python2 -  sudo apt-get install python-qt4
pyQt4for python3  -  sudo apt-get install python3-qt4
if it shows import error in qwt5, then enter below command
sudo aptitudeinstall python-qwt5-qt4To use Raspberry Pi on Laptop using Remote desktop in Windows:
sudo apt-get install xrdpAfter Installing xrdp, we have to enable SSH. For that Click Raspberry Pi logo presented in top left corner, then choose preferences, select Rpi configurations, then enable SSH which presented in Interfaces tab by clicking at radio button and then click OK to reboot the system.In short term(Rpi logo-Preferences-Rpi configurations-Interfaces(tab)-enable SSH)
After rebooted, connect the Raspberry Pi to the network, as a result you will get local IP address of the Raspberry Pi when you place the cursor on wi-fi icon as shown in the figure below.
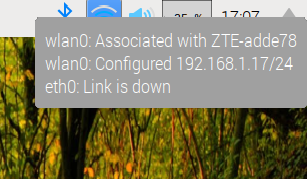
Now open Remote desktop icon in Raspberry Pi, then enter the IP address of the Raspberry Pi, here for example : 192.168.1.17 as shown below
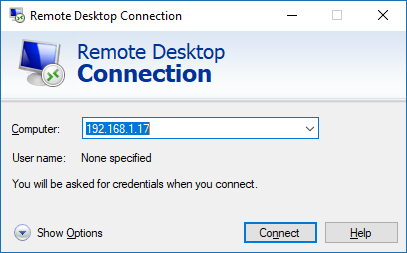
Now click Connect, It will ask for confirmation, Click Yes. Then It will prompt for username and password, Enter the username and password (Default username: pi) and password: raspberry. click OK to open the Raspberry pi virtually in windows.
To Preview Camera:
sudo apt-get install luvcviewAfter installing luvcview, open Terminal and type luvcview. Highly used to adjust the camera focus
To configure Serial communication in Raspberry Pi:
Normally Serial communication is enabled to use GPS/GSM/RFID like serial based hardware interfaces and also serially actuated applications . First type the below commands in terminal
sudo nano /boot/cmdline.txtAfter the above command executed, It opens the window as shown below. Delete the whole commands and replace with below commands
dwc_otg.lpm_enable=0 console=tty1 root=/dev/mmcblk0p2 rootfstype=ext4 elevator=deadline rootwaitdtoverlay=pi3-disable-bt
Press ctrl+X , then press Y to choose Yes, and click Enter to return to Terminal. Then type below command in Terminal
sudo nano /boot/config.txtAdd below commands to the current window
dtoverlay=pi3-disable-bt
enable_uart=1
Press ctrl+X, then press Y to choose Yes, and Click Enter to return to Terminal, then type below command to reboot the Raspberry Pi
sudo rebootAfter reboot, Serial will be enabled which is identified by Bluetooth is disabled. Generally either Serial or Bluetooth can be enabled at a time.
To open browser in Raspberry Pi from python code:
sudo apt-get install midoriPython code to open midori
import subprocess
choice="http://192.168.1.17/GPIO.php"
subprocess.Popen(["midori","-a",choice])
Change the URL, to open in browser in the choice variable. for example: choice=”https://www.pantechsolutions.net”
Webpage using Raspberry Pi:
Type the below commands in order to install webpage application with PHP
sudo apt-get install apache2sudo apt-get install php libapache2-mod-phpsudo apt-get install git-coregit clone git://git.drogon.net/wiringPicd wiringPi./buildNow open terminal and enter the below command to create php application file in root folder to control appliances or to display sensor values through webpage
cd /var/www/htmlBelow enter name in the form of php extension as shown
sudo leafpad gpio.phpIt will open leafpad to enter the PHP code. Type your PHP code in that leafpad and close it after saving it.
To open, this PHP page through your Webpage . Note down the local IP address as shown above. then open browser in PC/Mobile and connect the device with same network which raspberry pi is connected. then in browser URL tab, Type below URL in webpage. Below here IP and PHP file name may vary
192.168.2.26/gpio.phpTo use Google smart sheet in Raspberry pi :
Gspread:
Gspread library is used for accessing google smart sheet from Raspberry pi python to update sensor values, which can be further used for machine learning process from the cloud
sudo pip install gspreadoauth2client:
oauthclient library is used to access the cloud resources which having oauth client such as Google API
sudo pip install --upgrade oauth2clientPyOpenSSL:
sudo pip install PyOpenSSLTo install Matplotlib for plotting 2D graphs in Raspberry Pi using python script:
sudo pip install matplotlibClick below link to have Raspberry Pi projects with upto 12 Categories


Thanks, it was very useful! 🙂
Thanks for this collected information about raspberry pi download libraries .
sent me full detail to this email tq.